SLIMLINE INSTALLATION
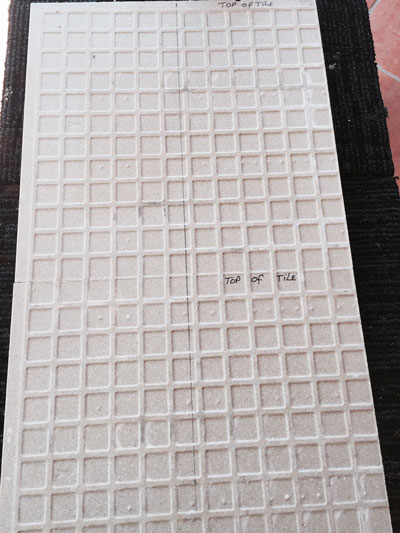
Here we have 2 x 300 mm x 300 mm ceramic tiles and we are going to put the indents ( cuts) into the top and bottom of the tiles to fix the Slimline Supportclips into . We are going to position one cut in the middle of the tile (150 mm from each edge ), as the markings show in the photo. When these tiles are installed they are going to have a zero joint , but this can be increased out to 10 mm by moving the gauge outwards Any adjustment to the joint is effected on the top installed Supportclip , by moving the position of the cut further towards the top of the tile . The Slimline Supportclip is designed to be epoxy fixed into the cut AND this is then supporting (when cured )the dead load of the tile . If it is used in conjunction with a good tile glue , you only need 1 fixing / tile , but if it is used as a stand alone Mechanical Fixing you need 2 fixings/ tile .
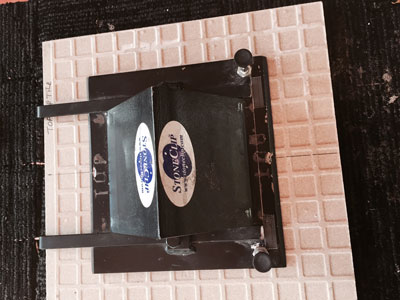
Here we are showing the tile with the jig positioned to install the top cut into the tile .You can see the gauge at the bottom of the photo with the measurement markings on it .When putting the top cut into the panel the operator holds the Jig with backwards pressure , so it is positioned right
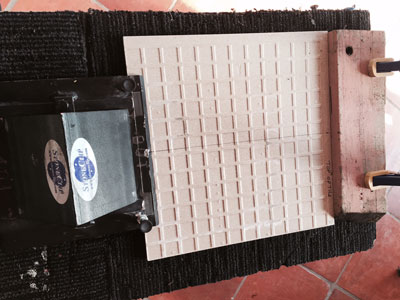
Here in this photo we are positioning the Jig to put in the bottom cut . The position of the bottom cut is always set in the same position and as i said the joint is effected by the positioning of the top cut .To install the bottom cut you have to turn the Jig around and drop the Index Plungers down to hold against the tile while you push forward when doing the cut .That is why there is a restraint at the end of the work bench/p>
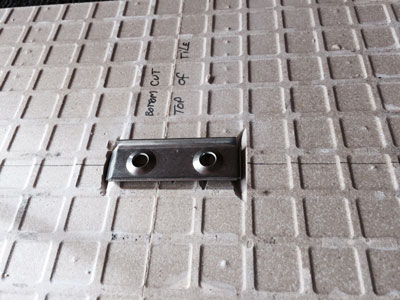
Here in this photo you can see the cuts in the top of the tile ( LHS ) and the bottom of the tile ( RHS). As you can see we also put another 2 cuts into the tile bed (LHS). This is done so as to be able to inject further epoxy into the matrix of the tile and thus give a far better bond between the tile and the Slimline Supportclip when it is positioned and epoxied into place .
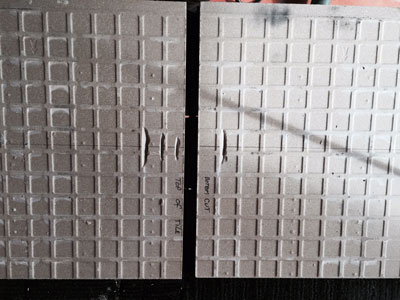
Here we have the 2 tiles installed together ( no epoxy yet) with a zero ; joint. By drawing the line top to bottom on the tile , you are able to be able to see if the clips are installed in the right place and alignmen when you install the epoxy .
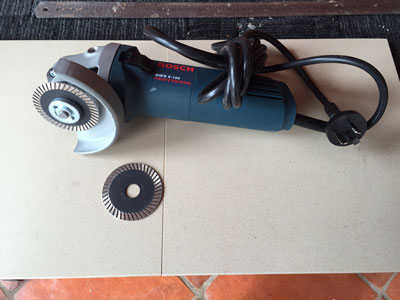
This shows the 100 mm grinder with the 65 mm blade installed.
This shows two tiles one(RHS)with a full Slimline Supportclip and the other one has a clip that has the top of the clip straightened out so it can be used in any position, such as offset positioning of tiles in facades This straightening out is sometime done when installing rough face stone SUCH AS STACK STONE and ROCK FACED (see video )

Shows 2 tiles epoxied and joined together to give a zero joint. It also shows one Slimline clip with the top of the clip straightened out and epoxied into the tile . We always use the24 hr epoxy ( Gel 69 ), as it is stronger than the 5 minute one .


Scan the QR code for convenient access to all our important links!

COPYRIGHT © 2024 STONECLIP